Getting started
This guide will take you through how to get your PRO set up in the Management Portal, how to configure the device, and how to use the device itself.
Prerequisites
- You must have access to your Management Portal
General configuration and default venue settings
General configuration
The Taxi Butler PRO booking features are entirely customisable and are designed to provide a seamless booking experience, tailored to the vehicles in your fleet.
- Each field has a “visible” and a “required” checkbox. If a field is set to “visible”, this means that it will display on the device when a user is placing a booking. The opposite is true when it is not set to “visible”. The “required” checkbox makes the fields mandatory when the user is placing a booking. The opposite is also true when it is not set to “required”.
Default venue settings
You can now configure default settings for new venues in the Management Portal. This means that every time you create a new venue, the default settings will be loaded.
- Head to the “Company Settings” tab
- Click on "Edit" at the top or bottom of the page
- Under “Default Taxi Butler Pro settings” section you can configure default settings for your Taxi Butler PRO that will be applied by default to all new venues/locations.
Configuring Taxi Butler PRO settings
As mentioned in the previous section, the Taxi Butler PRO settings can now be configured at a company level, meaning that the default settings will be loaded for every new venue, or directly at a venue level. When creating a new venue, you should fill out all the venue details like address, name, etc. as usual.
In this section, we will look at how to configure the settings, be it at a company or venue level.
The “taxi type” field allows you to preset multiple taxi types that are available in the Taxi Butler PRO booking menu. You can set this up to reflect the vehicles in your fleet.

- To set up your first taxi type, start by making the field “visible” and click on the icon.
- For each taxi type, you can choose an icon, a label, a description and the configuration with your dispatch system.
The configuration for your vehicle types will vary based on the dispatch system you are using. Some may require vehicle codes and some may have prefilled dropdown lists.
Under the “Future booking” setting, you can set a time range in which prebookings can be made.

You can set the minimum time to reflect how soon a user can place a prebooking. For instance, if you want users to only be able to place a booking with a minimum 24-hour notice, you can set the minimum reservation time to 1 day, 0 hours and 0 minutes.
You can also set a maximum time to reflect how far in the future a prebooking can be placed. Let’s say you would rather users place bookings no further than 3 days in the future, you can set the maximum reservation time to 3 days.
You can specify the minimum and maximum reservations times in days, hours and/or minutes
The destination, passenger name, passenger phone and personal message settings are all configured in the same way by using the “visible” and “required” checkboxes. Read more about this in the “General configuration and default settings” section above.
When the “Remember last trip” setting is enabled, the most recent destination entered in the device will appear at the top of the popular destinations list for a period of 60 minutes. This is very handy for venue staff to place multiple bookings with the same destination in a short period of time.
Deployment methods
Deployment method 1: Activating the device yourself then deploying it in a venue
Method 1 consists of launching the device for the first time and linking it to your Management Portal yourself.
- Create a venue in the Management Portal or add a device to an existing venue. See below to learn how to do this.
- Once you have setup the venue, turn on the PRO, connect it to 4G and enter the activation code. The venue can later connect the device to their local Wi-Fi network.
Deployment method 2: Letting the venue activate the device
Method 2 consists of setting up the venue in the Management Portal and then giving the device to the venue.
- Create a venue in the Management Portal or add a device to an existing venue. See below to learn how to do this.
- Give the device to the venue and when they are ready ask them to launch the device and go through the first-time launch wizard. They then communicate the activation code with you and you activate the device in the Management Portal.
- Click on “add venue” from the Dashboard page or from within the "Venues" tab.
- Fill out the location details like address, name, country, and timezone.
- Next, scroll down to "Butler PRO options" and configure the device for this location by referring to the "Configuring Taxi Butler PRO settings" section.
- Finally, you can press “save” to finalize the configuration for this venue.
- The Management Portal will now prompt you to add a device to this venue.
- Go to the “Venues” tab and select the venue you want to add the device to
- Click on the “Taxi Butler(s) at venue” tab.
- Next, click on the "Add Butler to venue" button.
- The Management Portal will now prompt you to add a device to this venue.
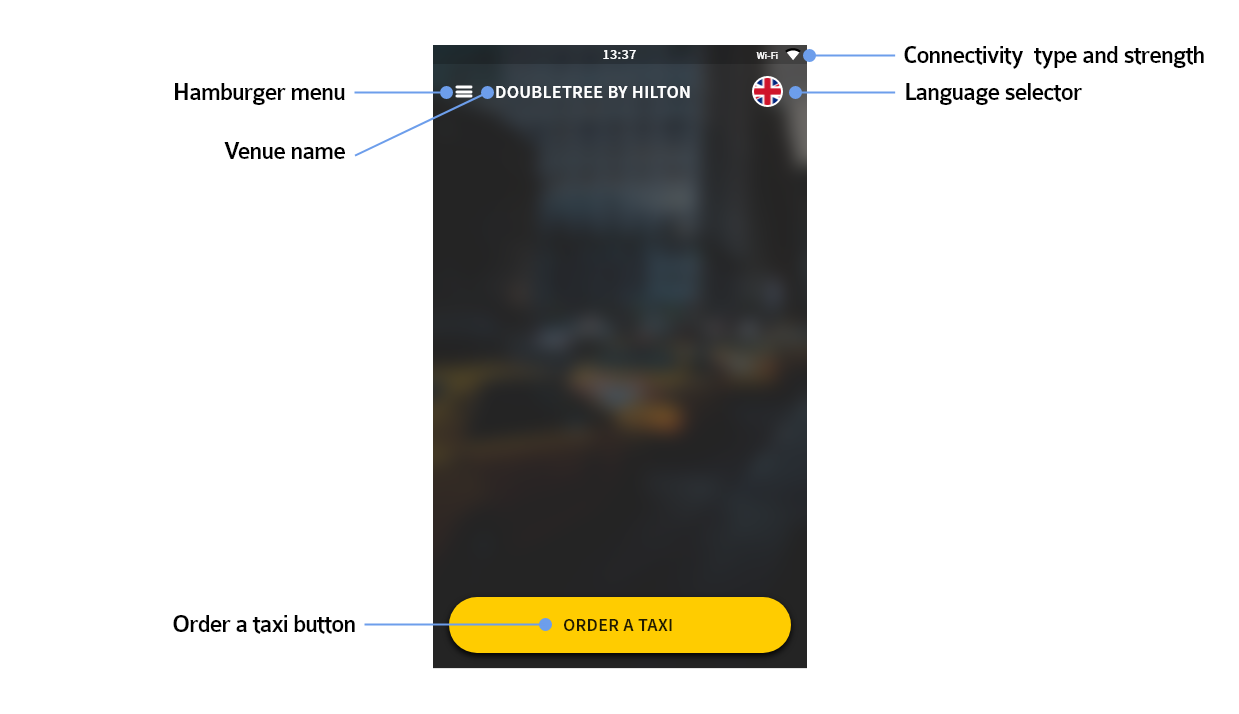
Home screen user interface layout
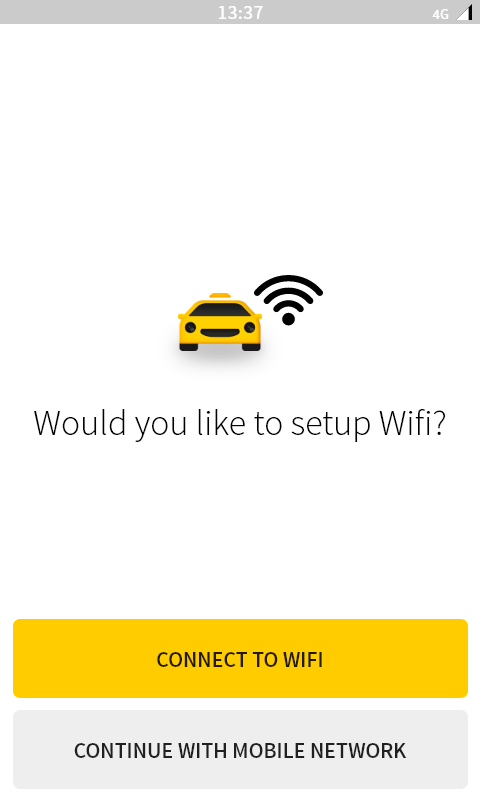
First-time launch wizard
The first-time launch wizard helps users to get set up on a Wi-Fi network or choose to use the built-in 4G cellular network. It automatically updates your device to the latest firmware for all the latest updates and provides the activation code to link the device to your Management Portal.
The launch wizard appears when the device is not connected to the internet or when it is connect to the internet but recognizes that it is not linked to a venue.
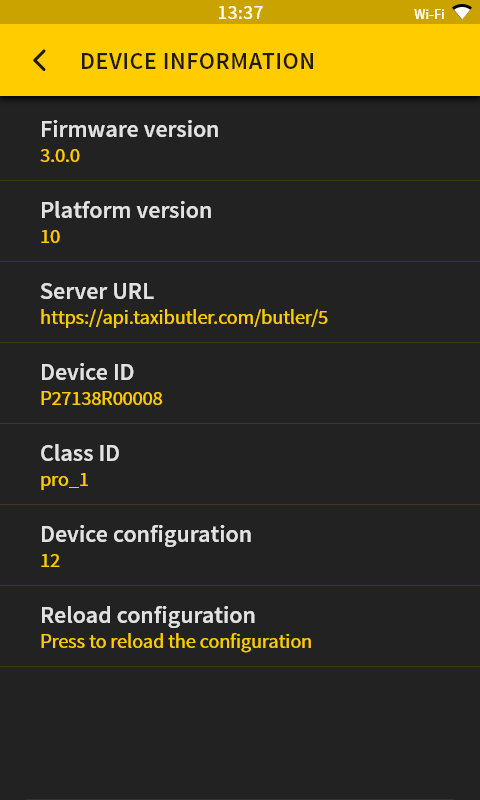
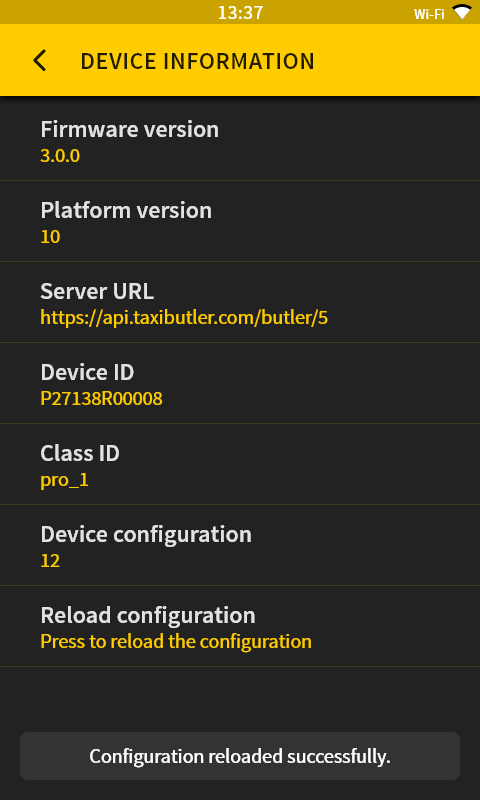
Reloading the device configuration
Reloading the device configuration allows you to sync and update the device following changes made in the venue settings of the Management Portal. Instead of restarting the device, simply:
- Click on the hamburger icon the top-left of the home screen to open the settings menu
- Click on "Advanced settings"
- Then click on "Reload configuration"
- The device will sync with your Management Portal and display a success message.
- The latest venue settings will now be loaded onto the device.
Placing bookings with the PRO
The Taxi Butler PRO brings awesome new functionalities and possibilities, but we still wanted to bring the simplicity of the booking a taxi in one-click.
That's why on the PRO you can still book taxis in one-click as well as book taxis with more advanced details.
- Click on the physical button on the front of the device
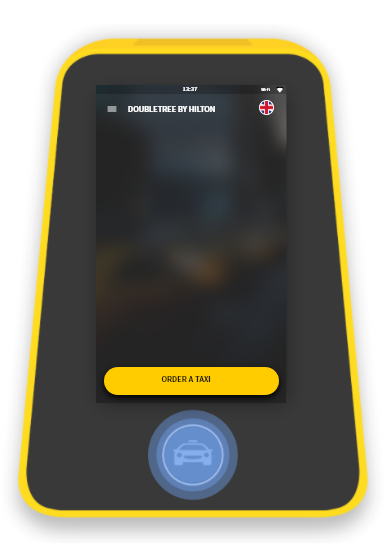
To place an advanced booking with booking information like taxi type, destination, date and time, and passenger information, users should:
- Click on the "Order a taxi" button on the screen of the device. This will open the booking menu.
- The user can now easily input the required information using the different sections.
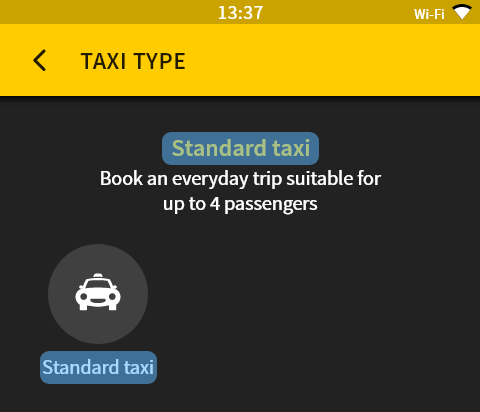
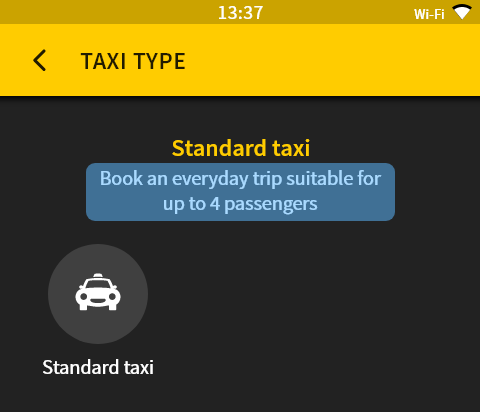
- Click on "Taxi type" to choose the desired taxi type. These can be set up in the Management Portal, as explained in the "Configuring Taxi Butler PRO settings" tab above.
- Click on "Destination" to enter the destination. Start typing in the destination using the street name, point of interest, business name, postcode or city, or simply choose from the recent or popular destinations.
- Click on "Destination" to enter the destination. Start typing in the destination using the street name, point of interest, business name, postcode or city, or simply choose from the recent or popular destinations.
- Next, the user can choose to enter a date and time for the booking. Use the scrolling element to choose a date and time. The user can easily reset it back to booking the taxi for as soon as possible by clicking "As soon as possible" button in the bottom of the screen.
- Finally, the user can enter a passenger name and telephone number.
- Once all of the desired, or required, information has been entered, click on the physical button on the front of the device to place the order.
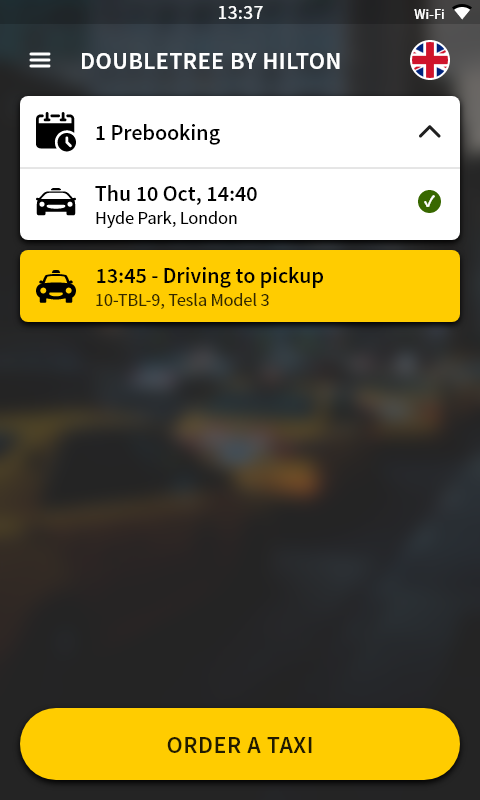
On the home screen, users can see all active bookings, prebookings and their statuses.
- Taxi requested: a request has been sent to your dispatch system for a taxi. The booking card displays a reference number for this booking.
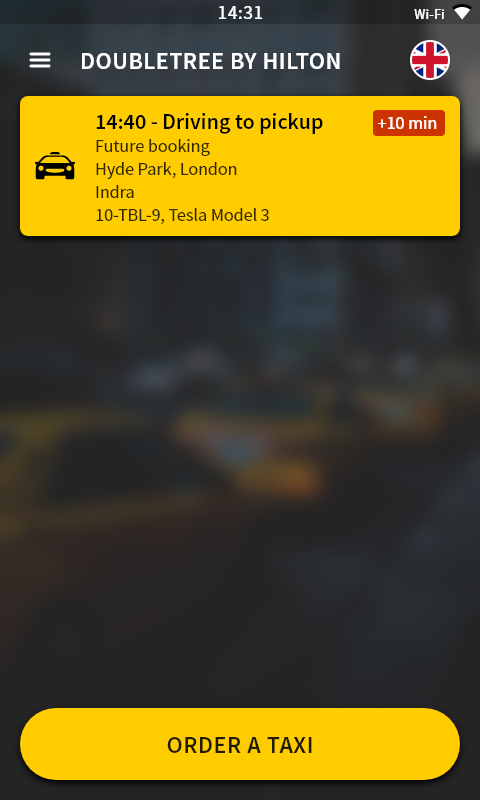
- Driving to pickup: a taxi is on its way to the venue. The estimated time of arrival, vehicle registration and vehicle model are displayed on the booking card.
- Arrived: the taxi has arrived at the venue. The card disappears after the passenger enters the vehicle and the driver has updated the status to driving to destination.
- Booking cancelled: the booking has been cancelled and the taxi will not be dispatched.
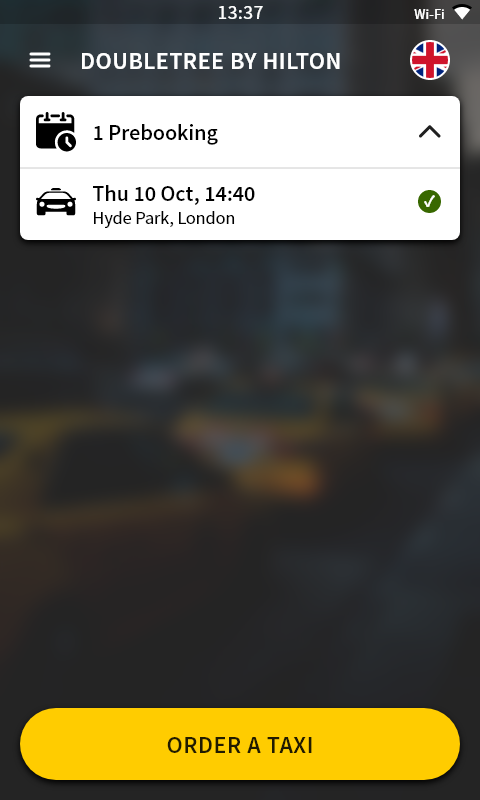
You can see any future bookings that have been pre-booked. They are all grouped up in the “Future bookings” card. You can expand this card by clicking on the arrow on the right of the card to see all the future bookings that have been placed.
All future bookings will display the booking time and destination on the card.
Pre-bookings that are delayed will update automatically with the estimated delay in the top-right of the booking card.
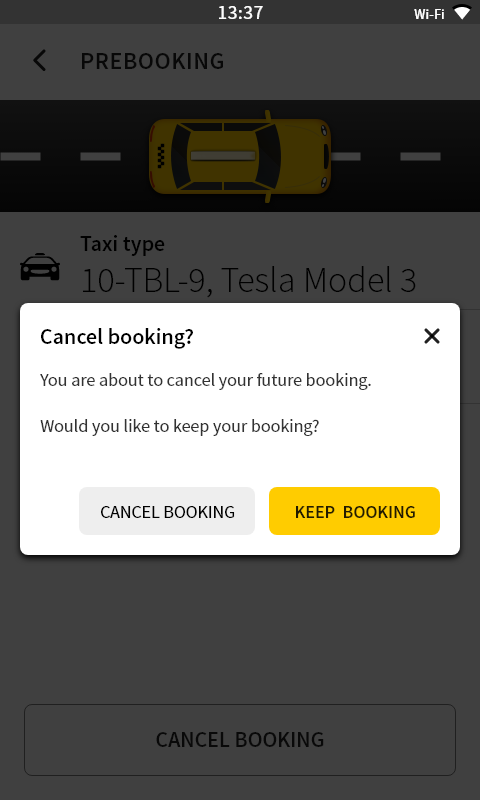
Users can cancel both active and prebooked bookings by clicking on the relevant card and clicking “Cancel taxi”.